The shiny new version of macOS Big Sur has landed, and many users are rushing to see it in action. As a user of a novel system, you might have run into an issue after the installation. Well, it’s unfortunate. But don’t worry, it happens to the best of us. In fact, there is a slew of situations where you’d be better off downgrading the operating system. Here are the most common reasons for stepping down.
Page Contents
When should you consider downgrading?

Source: insider.com
A good reason to step down is when a new version causes poor performance, and your device starts lagging. Although the compatibility of Big Sur is far-reaching, and you own a suitable model, it can be the reason behind a slow machine. If you tried everything to bring it back to speed and failed, it’s best to roll back.
Another reason is when the latest version doesn’t live up to your expectations. Do you really like the new features, or are they something you could live without? If they don’t do much for you, then move back to the earlier option.
Does Big Sur support your frequently used apps? The development team may not have gotten around to your essential apps to make them Big Sur friendly. If that is the case, check for an update for those apps, and if you don’t find them, it’s best to revert to Catalina.
You might have also hit a snag like a system error or bug during the installation process. The best recipe, in this case, is to go back and start over.
So, you’ve made a firm decision to step down and bring Catalina back. Before you start, make sure you keep the how-to steps at hand, either written down on a sheet of paper or open them on a spare device.
Step 1. Secure your data

Source: infoworld.com
Leaving an OS will wipe everything you downloaded and modified while working on it. So this step isn’t just for the sake of safety. Backing up will let you quickly restore your files and settings. All you need to do is to transfer your data somewhere. Some options to store clones of your files include:
Securing using Time Machine, a native feature of the system that lets you copy everything from your machine to an external hard drive. If you have no data to tuck away, you may use the backup you have from before the upgrade.
Another way is to migrate your files to the Cloud storage of your choosing. Here’s how you can do it:
- Use Finder to copy your data to an external hard drive.
- Backup your data using online backup tools like Dropbox, Backblaze, Carbonite, or any other.
Step 2. Using a handy option: Bootable Installation Drive
Source: arstechnica.com
This step will require some tech prowess, but don’t worry. We will cover everything in our guide.
To install such hefty software as Catalina (over 8GB), you need to grab an external hard drive with plenty of free space. Then, get Catalina from the Mac App Store. After you complete the download, the installer will launch. At this point, you need to cancel the installation by pushing Command + Q.
Next, prepare your external hard drive. You can format it if it’s not a clean slate. It’s recommended to use Install Disk Creator, a free program designed specifically for bootable drive installations. Download it and follow the next steps:
- Plug in your external disk.
- Launch Install Disk Creator app.
- Select your disk when a window appears.
- The installer will pick your downloaded Catalina file.
- Click Create Installer.
- Enter your credentials.
- Wait till the creation process is over.
Now your bootable installer is ready for use. Next, you need to allow booting from external drives. It can be problematic with some models. Follow these steps for a smooth bootable installation:
- Start in Recovery Mode.
- Go to Utilities.
- Open Startup Security Utility.
- It will ask you to type in your firmware password.
- Check off the option titled Allow booting from external sources.
That’s it! Now you can reinstall Catalina to your device.
Step 3. Clear your device

Source: theverge.com
Of all the steps you will follow, this one takes the most time. Below, we have put together everything you need to do to remove Big Sur from your Mac.
- Do a restart.
- Press Command+R to bring up the Utilities Menu.
- Select “Disk Utility.”
- Click Continue and choose “macOS Boot Disk.”
- Find and click Erase.
- Choose “APFS Format” from Dropdown and click Erase.
That’s it! Wave goodbye to Big Sur because it’s time for Catalina to make a comeback.
Step 4. Perform the reinstallation
Sourrce: youtube.com
Now you should reinstall macOS Catalina using a USB drive with bootable macOS Catalina. We showed you how to create one in Step 2.
While Apple recommends reinstallation using the Utilities window in the Recovery mode, we will apply a bootable copy to install the OS from the ground up.
- Plug your device into a power supply.
- Do not close the lid or let it go into sleep mode until you’re done.
- Plug in your drive with a bootable installer.
- Restart your Mac holding the Option key.
- Choose your external resource from the list of disks.
- Go through the Terms and click on Continue once you are ready.
Check the progress bar from time to time and relax – the most challenging part is behind you.
Step 5. Your bulletproof restore option: Time Machine
Source: eshop.macsales.com
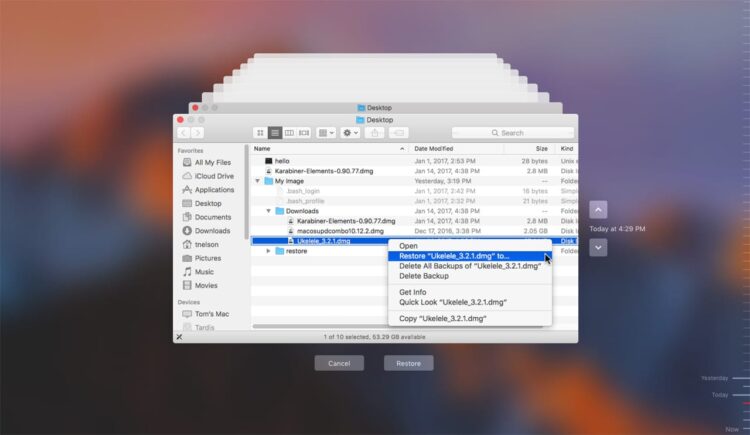
That is the reason you went through all the trouble of backing up your files earlier. With Time Machine, you can revive your data quickly. Follow these steps:
- Connect to Wi-Fi.
- Restart your Mac.
- Activate Recovery mode by holding Command + R.
- When macOS Utilities appear, choose Restore from Time Machine Backup.
- Select the hard drive from which you will recover.
- Choose a backup version (it’s best to select the most recent one).
- Wait till Time Machine restores your data.
That’s all! If you follow the steps correctly, you can now enjoy the system you are more comfortable with. The journey will take some time, so grab some coffee while it’s in the works.

